

Home Improvement

Home Home Improvement
There are some tips and techniques for home renovation and conversion on our site, which you must watch to make your home impressive to show.

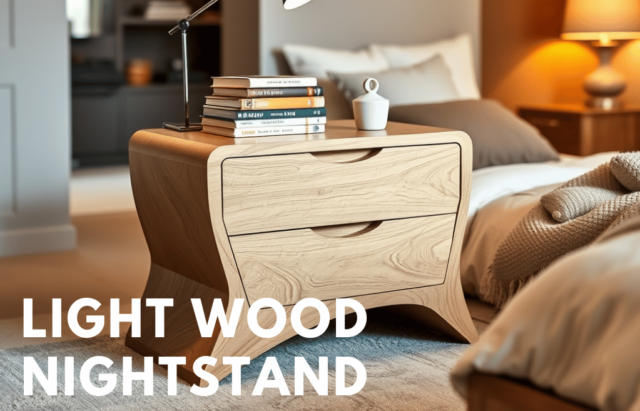
Light Wood Nightstand: A Perfect Blend of Elegance and Functionality, Its Benefits, Key Features, Maintenance, and More

0
Light Wood Nightstand

Introduction

A light wood nightstand is a versatile and stylish piece of furniture that can enhance the aesthetics and functionality of any bedroom. Whether you need a convenient spot to place your bedtime essentials, a surface for a lamp, or additional storage, a nightstand serves multiple purposes.

This article delves into the various aspects of light wood nightstands, including their types, benefits, materials, styles, maintenance tips, and buying considerations.

CategoryDetails
Light wood nightstandA small bedside table made from light-colored wood like oak, maple, pine, birch, or bamboo.
BenefitsAesthetic appeal, versatility, durability, space optimization, eco-friendly choice.
TypesTraditional, modern, floating, open shelf, multi-functional nightstands.
Materials UsedOak (durable), maple (smooth), pine (affordable), birch (versatile), bamboo (eco-friendly).
Popular StylesScandinavian, rustic, mid-century modern, industrial, and contemporary.
Maintenance TipsRegular dusting, avoiding excess moisture, using wood polish, protecting from sunlight, and preventing scratches are also necessary.
Buying ConsiderationsSize & dimensions, storage needs, material quality, style compatibility, budget.

What is a Light Wood Nightstand?

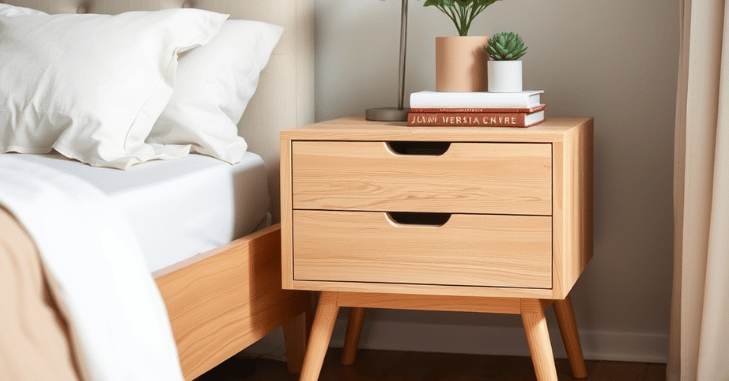
A light wood nightstand is a small bedside table made primarily from light-colored wood, such as oak, maple, pine, birch, or bamboo. It typically features drawers, shelves, or cabinets for additional storage space.

These nightstands blend well with interior designs, including minimalist, rustic, Scandinavian, and modern aesthetics.

Benefits of a Light Wood Nightstand

Aesthetic Appeal

Light wood nightstands exude a warm and inviting ambiance. Their neutral tones complement different color palettes, making them suitable for various bedroom themes.

Versatility

Available in various designs, a light wood nightstand can serve multiple functions, from holding books and electronic devices to serving as a decorative piece.

Durability

High-quality light wood nightstands are built to last. Woods like oak and maple offer strong, long-lasting durability, ensuring that your nightstand remains a staple in your bedroom for years.

Space Optimization

Many nightstands come with drawers or shelves, providing extra storage to keep your bedroom tidy and organized.

Eco-Friendly Choice

Sustainably sourced light wood, such as bamboo, offers an environmentally friendly option for furniture enthusiasts.

Why Light Wood Nightstands Are a Smart Choice for Modern Bedrooms

Light wood nightstands have become popular in interior design due to their natural warmth, versatile style, and ability to brighten a space without overwhelming it. The soft tones of light wood, such as oak, maple, or birch, complement a wide range of bedroom aesthetics — from minimalist Scandinavian and contemporary designs to rustic and coastal themes. Beyond aesthetics, these nightstands often offer practical storage solutions with drawers or shelves that keep essential items within easy reach, helping to maintain a tidy and organized bedside area. Their neutral hues also make them easy to pair with various finishes and bedroom furniture, making light wood nightstands both a functional and stylish addition to diverse décor schemes.

Types of Light Wood Nightstands

Traditional Nightstands

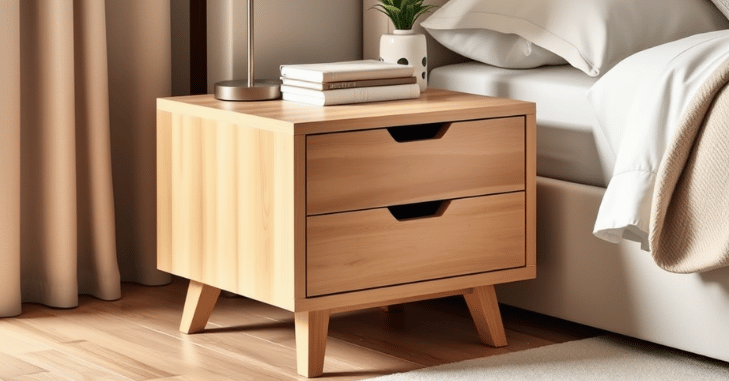
These nightstands usually have a classic design with one or more drawers and are made from solid wood like oak or maple.

Modern Nightstands

Featuring sleek lines and minimalist designs, modern nightstands often incorporate materials like metal or glass alongside light wood finishes.

Floating Nightstands

Mounted to the wall, floating nightstands save floor space and provide a contemporary, airy look.

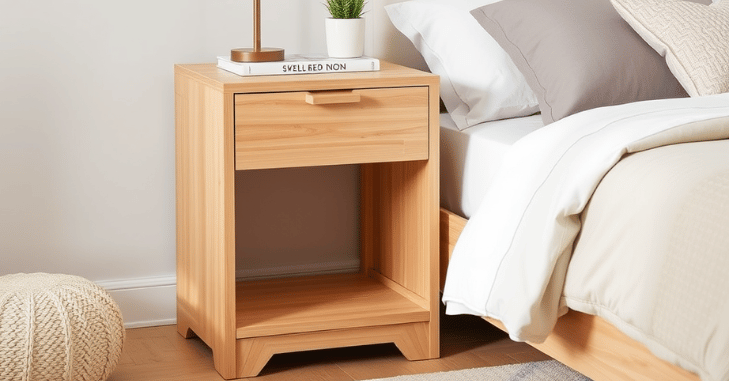
Open Shelf Nightstands

These nightstands prioritize accessibility, offering open shelving instead of drawers for easy storage.

Multi-Functional Nightstands

Some nightstands include features like charging stations, pull-out trays, or built-in lighting to add extra convenience.

Materials Used in Light Wood Nightstands

Oak

A strong and durable choice, oak offers a natural grain pattern and resists wear over time.

Maple

Known for its fine grain and smooth finish, maple provides a refined look with excellent durability.

Pine

Lightweight and budget-friendly, pine is easy to work with and often used in rustic designs.

Birch

A versatile option, birch wood nightstands have a pale, smooth texture that fits well in modern interiors.

Bamboo

An eco-friendly choice, bamboo is both lightweight and sturdy, making it ideal for sustainable furniture.

Scandinavian Style

Characterized by simple lines, tapered legs, and natural finishes, Scandinavian nightstands emphasize functionality and minimalism.

Rustic Style

Rustic nightstands showcase raw textures, distressed finishes, and a cozy, country-inspired aesthetic.

Mid-Century Modern Style

Defined by clean lines and elegant curves, mid-century modern nightstands often feature angled legs and minimalist designs.

Industrial Style

A blend of wood and metal, industrial-style nightstands add a touch of ruggedness to a bedroom.

Contemporary Style

These nightstands focus on sleek and innovative designs with smooth surfaces and a minimalist approach.

How to Maintain a Light Wood Nightstand

Regular Dusting

Use a soft cloth or microfiber duster to remove dust and prevent buildup.

Avoid Excess Moisture

Wipe spills immediately to prevent water damage, and use coasters under beverages.

Use Wood Polish

Applying a wood polish enhances the natural shine and protects the finish.

Protect from Sunlight

Prolonged exposure to direct sunlight can cause fading; position your nightstand away from harsh sunlight.

Prevent Scratches

Place felt pads under decorative items and avoid dragging heavy objects across the surface.

Buying Considerations for a Light Wood Nightstand

Size and Dimensions

Ensure the nightstand fits your available space and aligns with the height of your bed.

Storage Needs

Consider how much storage you need for hidden storage or open shelves for easy access.

Material Quality

Choose solid wood or high-quality engineered wood for durability.

Style Compatibility

Select a nightstand that complements your existing bedroom decor.

Budget

Set a reasonable budget while prioritizing quality and longevity.

Conclusion

A light wood nightstand is an excellent addition to any bedroom, offering aesthetic charm and practical utility. Selecting the right nightstand with various styles, materials, and features can enhance your space while meeting your functional needs.

By maintaining it properly, you can ensure its longevity and enjoy its benefits for years.

Apart from that if you want to know about “Small Lamps for Bedroom: The Perfect Blend of Style and Functionality” then please visit our “Home Improvement” Category.

FAQs

What kind of wood works best for a bedside table?

Nightstands are frequently made of oak, maple, pine, and cherry wood.

What distinguishes a nightstand from a bedside table?

Compared to bedside tables, which are frequently smaller and more portable, nightstands are more extensive and typically offer more storage options.

What is the ideal height for a nightstand?

The ideal nightstand height is between two and four feet or roughly the same as the top of your mattress.

What ought to be on a bedside table?

Typical nightstand essentials include a book or e-reader for reading before bed, a diary and pen for recording ideas or dreams, a tiny bottle of water, and a phone charger.

What is a light wood nightstand?

A light wood nightstand is a bedside table made from light-toned woods such as oak, maple, birch, or ash, designed to provide storage and surface space next to a bed.

Top Things You Need for a Resilient and Stylish Glass Architecture

0

Glass architecture can make any building look sleek, modern, and full of natural light. But while the style may look simple on the outside, creating a glass structure that’s both beautiful and durable takes thoughtful planning. From materials to support systems, there’s a lot that goes into making your design work for the long haul. 

Below are the top things you need to bring your vision of resilient and stylish glass architecture to life. Whether you’re working on a home, office, or public space, these essentials can guide your project toward success.

1. High-Quality Glass Materials

The foundation of any strong glass structure is the glass itself. You’ll want to choose materials that are not only visually appealing but also built to handle external pressures like weather, wind, and impact. Tempered glass, laminated glass, and double-glazed panels are popular options because they offer extra strength and insulation. These materials can resist breakage and even reduce noise from outside. 

Keep in mind that the glass you choose will affect both safety and energy efficiency. It’s best to talk to a professional about what works best for your climate and building needs. Choosing the right type early on can help avoid costly fixes later.

2. Strong Framing Systems

Even the most durable glass won’t hold up without proper support. Framing systems, typically made of aluminum or steel, are essential to hold the glass in place and maintain structural integrity. The frame must be designed to distribute weight evenly and withstand the forces of nature. Minimalist frames are popular in modern glass architecture, but they still need to be engineered for strength. 

Custom options can blend durability with design, ensuring they don’t distract from the glass’s clean look. Always ensure that your framing system complies with local building codes. Consulting with an expert can help match the right frame to your glass choice and architectural style.

3. Proper Insulation and Glazing

Glass buildings are beautiful, but without the right insulation, they can become energy guzzlers. Insulated glazing units (IGUs), also known as double- or triple-glazed glass, help maintain indoor temperatures by reducing heat transfer. This means your heating and cooling systems won’t have to work overtime. 

Glazing also helps reduce condensation and blocks out harmful UV rays. In some designs, reflective coatings or low-E glass are used to further control heat and light. Good insulation isn’t just about comfort—it’s also a big factor in long-term energy savings. Make sure your glass panels are paired with efficient sealing systems to prevent air leaks.

4. Customize Drawing for Your Glass Structure

Before anything is built, detailed planning is essential—and that’s where a customize drawing comes in. A customized glass shop drawing maps out the dimensions, materials, and connections specific to your structure. It ensures that all pieces come together seamlessly, both structurally and visually. These drawings take into account load calculations, joinery details, and even aesthetics. It’s a necessary step to avoid miscommunication between architects, engineers, and installers. 

Companies like Architectural Communication & Design provide consultation and customize glass shop drawing to guide these types of projects from concept to execution. This extra step can save time, reduce costly mistakes, and bring clarity to your construction team.

5. Weather-Resistant Sealants and Hardware

To keep your glass structure strong and long-lasting, the right sealants and hardware are key. Silicone-based sealants are commonly used because they offer flexibility and durability against weather changes. High-quality gaskets and fasteners made of stainless steel or treated aluminum help prevent corrosion. These elements are often overlooked, but they play a huge role in maintaining the airtightness and water resistance of the structure. 

Without them, even the best glass can become vulnerable to leaks or structural damage. Regular inspection and maintenance of these components are also important. Investing in the right products upfront makes your building more secure and less prone to early wear.

6. Aesthetic Enhancements and Functional Features

A glass structure isn’t just about transparency—it’s also about design. Tinted, frosted, or patterned glass can add both privacy and style. You can even incorporate smart glass that adjusts opacity with the touch of a button. Skylights, glass walls, and curtain walls all offer unique ways to play with light and space. 

Think about how your building will interact with natural sunlight throughout the day. Creative design choices can help your space feel more open, warm, and visually appealing. Just make sure any enhancements don’t compromise the structural integrity of your build.

7. Professional Installation and Ongoing Maintenance

Lastly, even the most well-designed structure needs expert hands to bring it to life. Professional installation ensures that each component—glass panels, frames, sealants—is placed correctly and securely. It’s not a DIY project; incorrect installation can lead to issues like water leaks, shifting panels, or safety hazards. 

After construction, regular maintenance is necessary to keep your glass looking clear and functioning well. This includes cleaning, resealing, and inspecting for wear and tear. Partnering with experienced professionals from start to finish can make a big difference in the outcome. It’s an investment that pays off in the building’s longevity and performance.

Conclusion

A glass structure can be a stunning addition to any environment, but getting it right involves more than just picking pretty panels. By focusing on quality materials, custom planning, strong support systems, and professional guidance, you can create a space that stands the test of time—while turning heads along the way.

If you want to know more about What is a Screened Lanai Porch? then visit our Home Improvement category.

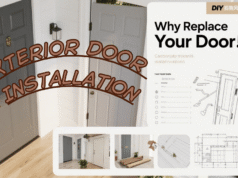
Exterior Door Installation: Why Replace Your Door, Types of Doors, Step-by-Step Installation, Common Mistakes, And More

0
Exterior Door Installation

Exterior Door Installation

Installing a new exterior door is one of the most impactful home improvement projects you can undertake, blending practicality, security, and style in a single upgrade. A door isn’t just an entryway; it’s the first thing guests see, the barrier that keeps your home secure, and a significant factor in energy efficiency.

Whether you’re swapping out an outdated door, repairing storm damage, or simply looking to give your home a fresh, modern look, understanding the process of exterior door installation is essential. From choosing the right door material, be it sturdy steel, classic wood, or low-maintenance fiberglass, to precise measuring, framing, and sealing, each step plays a crucial role in achieving a flawless fit and finish.

This guide will walk you through everything you need to know, offering clear instructions, expert tips, and insights into costs and common mistakes to avoid. By the end, you’ll not only understand how to install an exterior door but also how to maximise its benefits for security, energy savings, and curb appeal.

Exterior Door Installation – Key Information Table

CategoryDetails
Why Replace Your Exterior Door?Enhanced Security: Modern reinforced doors and locks. – Energy Efficiency: Insulated doors cut heating/cooling costs. – Curb Appeal: Stylish designs boost your home’s look. – Added Value: Raises resale value.
Types of Exterior DoorsEntry Doors: Steel (secure, affordable), fiberglass (durable, low maintenance), wood (classic look, needs upkeep), Composite (mixed materials, tough), Wrought Iron (very secure). Patio Doors: Sliding glass (space-saving), French (hinged elegance), Sliding French (blend of both), Storm doors (extra weather protection).
Door Installation TypesPrehung Doors: These come with a frame, making installation easier. Slab Doors: Door only, requires more skill to fit into an existing frame.
Step-by-Step Installation Summary1️⃣ Remove the old door unit & clear frame. 2️⃣ Inspect & measure rough opening. 3️⃣ Prepare opening (clean, level, caulk). 4️⃣ Install sill pan (if needed). 5️⃣ Set the door in place. 6️⃣ Level & shim. 7️⃣ Fasten the frame securely. 8️⃣ Insulate & seal edges. 9️⃣ Install hardware. 🔟 Test operation & make adjustments. 1️⃣1️⃣ Finish with trim & final touches.
Common Installation MistakesIncorrect measurements Ignoring the level & plumb Poor shimming Over-tightening screws Skipping insulation & sealing
DIY vs. Professional InstallationDIY Pros: Saves money, flexible schedule, satisfying. DIY Cons: Time-consuming, requires skill/tools, risk of mistakes. Pro Pros: Expertise, faster, guarantees quality. Pros and Cons: Higher Cost, Less Personal Control.
Cost BreakdownAverage cost: $1,452. Range: $546 – $2,374. Simple Projects: From $200. Complex Installations: $7,000+. Labour Costs: $30–$90/hr. Extra Costs: Permits, old door disposal, contractor fees (13–22%).
Signs You Need a New Door– Drafts even after sealing.- Water leakage after rain.- Warped, rotten, or swollen frame.- Door sticks or locks poorly.- Cosmetic damage or outdated design.
Choosing a Professional– Research reviews & ratings.- Check licences & insurance.- Get 2–3 quotes.- Maintain clear communication.
Best Door for DurabilitySteel – strongest & most secure. Fiberglass – durable & affordable.

Why Replace Your Exterior Door?

Replacing your exterior door can bring numerous benefits:

  • Enhanced Security: Modern doors offer reinforced construction and robust locking systems.
  • Improved Energy Efficiency: Insulated doors reduce energy consumption and lower heating/cooling costs.
  • Increased Curb Appeal: A stylish new door can significantly enhance your home’s visual appeal.
  • Added Value: Well-installed doors can increase your home’s resale value.

Planning Your Door Installation

Before you begin, careful planning is essential. Start by choosing the right door, taking into account the material, style, and features that suit your needs and budget. Next, measure the opening with precision. Accurate measurements of the width, height, and depth at multiple points are critical for a proper fit.

Types of Exterior Doors

Understanding the different types of exterior doors is crucial for making the right choice for your home. Here’s a breakdown of standard options:

Entry Doors

These are sturdy doors with keyed entry locks and customizable features.

  • Steel Doors: Offer excellent security and are budget-friendly, but can be prone to dents. They often have tighter-fitting frames and energy-efficient core insulation.
  • Fiberglass Doors: Durable, weather-resistant, and low-maintenance, with good insulation properties. They can mimic the look of wood and are more dent-resistant than steel.
  • Wood Doors: Provide a classic, beautiful look, but require regular maintenance and may not be as secure as steel or fiberglass. They are best suited for sheltered entryways.
  • Wrought Iron Doors: Highly secure and durable, able to withstand the elements. These can be customized with different types of glass and hardware.

Patio Doors

Typically feature large glass panels and slide or swing open to provide access to patios or decks.

  • Sliding Glass Doors: Feature two glass panels that slide open.
  • French Doors: Offer a traditional aesthetic with doors that open on a hinge.
  • Sliding French Doors: Combine the look of French doors with the space-saving ability of sliding doors.

Prehung vs. Slab Doors

When choosing an exterior door, you’ll typically encounter two main types:

  • Prehung Doors: Come already mounted in a frame, making installation easier and ensuring a proper fit. Ideal for new construction or complete replacements.
  • Slab Doors: Consist of just the door itself, without a frame, hinges, or hardware. More design flexibility is available, but it requires more skill and effort to install.

Step-by-Step Exterior Door Installation

Here’s a detailed guide to installing an exterior door:

Remove the Old Door Unit

Begin by removing the old door unit. Detach the existing door by unscrewing the hinges from the jamb and gently prying the jamb away with a pry bar, taking care not to damage the surrounding frame. Once the door and jamb are out, clear the structural frame of any debris so the new door has a clean surface to sit against.

Inspect the Rough Opening

Next, inspect the rough opening. Take accurate measurements of the height and width at several points to confirm the space is the correct size for your new door. Check that the opening is level, plumb, and square, and ensure the subfloor beneath the threshold is even.

Prepare the Opening

Prepare the opening by cleaning it thoroughly and removing any leftover debris or old caulk. Verify that the subsill is level, making adjustments if needed. At this stage, install a drip cap or Z-flashing above the door opening to protect against water intrusion, and apply a bead of caulk along the framing where the new door’s exterior trim will meet the wall.

Install the Sill Pan (if applicable)

If applicable, install a sill pan to prevent water damage over time. Cover the sill area with self-sticking flashing tape for added protection before positioning the new door.

Set the Door in Place

You are now prepared to install the door. Carefully slant the door unit into the aperture after lifting it with assistance. Make sure the unit beds snugly into the caulk for a waterproof seal by sliding the outer molding up beneath the Z-flashing and pressing it firmly into place.

Level and Shim

Level and shim the door to make sure it operates correctly. Temporarily secure the door by placing a screw near the top of the hinge-side jamb. Examine the gaps between the door and its frame to ensure they are even, and add shims behind the hinges and along the lock side for consistency.

Fasten the Frame

Once the door is aligned, fasten the frame. Use long screws — at least three inches — to attach the frame securely to the wall studs, tightening them carefully without over-tightening, which could distort the frame.

Insulate and Seal

With the frame secured, insulate and seal the space between the doorjamb and the frame using low-expanding foam. Caulk around the exterior edges to block drafts and water intrusion.

Install Hardware

The next step is installing the hardware. Fit the lockset according to the manufacturer’s instructions, attach the strike plate to the frame, and add any extra accessories such as a door sweep or storm door for additional protection.

Check Operation

After installation, check the operation of the door. Open and close it several times to ensure it swings smoothly and that the lock engages correctly. Make any minor adjustments as needed for perfect functionality.

Finishing Touches

Finally, finish the job with neat details. Install new trim if required, cut and trim the shims, and fill any gaps between the stud and the door frame with insulation or minimal expanding foam before replacing the casing. Fit either existing or new casing, secure it with finish nails, and set and fill all visible fastener holes for a polished look.

Common Installation Mistakes and How to Avoid Them?

Even experienced DIYers can make mistakes during door installation.

  • Incorrect Measurements: Always measure accurately and double-check your measurements.
  • Improper Shimming: Position shims correctly to ensure the door frame is stable and aligned.
  • Using Incorrect Fasteners: Use screws of the appropriate length and type to fasten the door frame to the wall studs securely.
  • Failing to Check for Squareness: Ensure the door frame is square to prevent the door from binding.
  • Using the Wrong Tools or Hardware: Invest in high-quality hardware and use the appropriate tools for the job.
  • Overlooking Insulation: Insulate properly to prevent energy loss.
  • Not Preparing the Frame Properly: Inspect the frame for warping, rot, or structural weakness.
  • Over-Tightening Screws: Tighten screws just enough to keep everything in place, but not too much.
  • Poor Sealing: Caulk and seal your exterior door to keep drafts and water out.

DIY vs. Professional Installation

Deciding whether to install an exterior door yourself or hire a professional depends on your skills, budget, and the complexity of the job.

DIY Installation

  • Pros: Cost savings, flexible timing, personal satisfaction.
  • Cons: Requires skill, time-consuming, may require specialized tools, and there is a potential for mistakes.

Professional Installation

  • Pros: Time efficiency, expertise and experience, assurances, and tranquility.
  • Cons: Higher initial Cost, may need to align with their schedule, less personal control.

Cost of Exterior Door Installation

The cost of exterior door installation can vary widely depending on several factors. The type and material of the door play a significant role, with steel doors generally being less expensive than wood or fiberglass options. Since door installers usually charge between $30 and $90 per hour, labor costs also affect the final price.
The cost may increase significantly with extra features like sidelights, transoms, or improved hardware. Homeowners typically pay $1,452 on installation, while the range can be as low as $546 or as high as $2,374. Complex installations can cost $7,000 or more, while simple projects could cost as little as $200.
In addition, there are additional expenses to take into account, which can raise the project’s overall cost by 13% to 22%. These expenses include permits needed by local building rules, fees for removing and discarding the old door, and additional charges if you engage a general contractor.

Choosing the Right Professional

If you decide to hire a professional, here are some tips for finding the right one:

  • Research: Look for reputable installers with good reviews
  • Credentials: Check for licenses and insurance
  • Get Multiple Quotes: Compare quotes from different installers
  • Communicate Clearly: Ensure clear communication with the installation team.

By following these guidelines, you can ensure a successful exterior door installation that enhances your home’s security, energy efficiency, and curb appeal.

Signs You Need a New Exterior Door

  • Persistent drafts even after replacing the weather stripping.
  • Water infiltration around the door after heavy rain.
  • Visible warping, rot, or swelling in the frame.
  • The door is difficult to open, close, or lock.
  • Apparent cosmetic damage or outdated style.

Conclusion

A properly installed exterior door offers security, energy savings, and style. Every step, from measuring and weatherproofing to shimming and caulking, counts for a successful, long-lasting result. Invest time and attention during installation, and you’ll enjoy reliable performance for years.

Installing an exterior door can be a rewarding DIY project that enhances your home’s security and appearance. By following this guide, you’ll ensure a successful installation that meets your needs and preferences. Whether you choose to tackle the project yourself or hire a professional, understanding the process will help you make informed decisions. Happy installing!

Want to know about “Light Wood Nightstand: A Perfect Blend of Elegance and Functionality, Its Benefits, Key Features, Maintenance, and More” Check out our “Home Improvement” category.

FAQs

What is the price of installing an external door?

The typical cost of installing an outside door is $1,397; however, costs might vary from $547 to $2,291 or more. The type of door, the material, the size, and the labor all have a significant impact on the total cost. To obtain a precise cost for your job, it is essential to compare estimates from reliable installers.

Is installing an external door challenging?

Installing front doors is not always simple. To get them to swing perfectly, they need a delicate touch. Nevertheless, replacing an old external door with a new one may be a simple and doable do-it-yourself project, provided all the right factors are present and sound judgment is used.

What is the greatest kind of front door?

Steel doors are the finest choice for durability and security because of their strength. A fiberglass door would be the best choice if you’re on a tight budget and need a sturdy, affordable option.

Can I perform the door installation myself?

Installing or hanging a door isn’t as complicated as it looks. If the new door core is the same size as the old one, replacing the old door is simple. Purchasing a prehung door eliminates the need to construct the door frame, making it simple to install a door in a newly built partition wall.